Category Archives: Techniques

Cold Pizza Sucks – some reheating suggestions

DSC_6408

With the holidays here, pizza consumption in the US is reaching record levels. Our household is no different. Frequently out of time, we do what many of our fellow Americans do; order pizza. While hot pizza can be delicious, cold pizza, not so much. Being residents of the land of plenty and having friends and family that believe in going overboard on pizza orders, we often find ourselves with leftovers.

Over the years I have tried many different approaches to reheating pizza with mixed results. Microwaving leftover pizza is the easiest but possibly the worst way as it leaves the pizza very soggy. Sticking it back in the oven is OK but you can overcook i.e. burn the pizza. A hybrid approach works reasonably well where you use a microwave to heat the pizza and then use the broil (or grill) function on the oven to finish the pizza. You really have to keep an eye on the pizza in the oven though because broiling is at a very high heat and the pizza can go from food to charcoal in a jiffy.

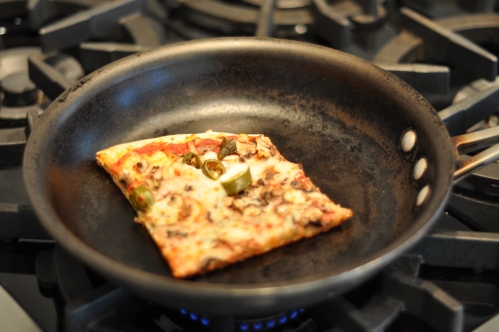
The method that works best for me is loosely based on my stovetop pizza approach (see here). Using a frying pan on low heat, gradually heating a pizza works very well. It makes the crust crisp, probably more than what it was when it was fresh and heats the pizza through. After a lot of trial and error, this is the foodydoody preferred approach.

6 Comments

Filed under Techniques

Make your burgers magical

Ever wonder why the burgers at the fancy schmanzy places taste so good? Here is one possible reason.

Leave a comment

Filed under Techniques

Sharpening Knives

I have been meaning to make a video on this for a long time. Here you go. Enjoy and let me know if it was useful.

2 Comments

Filed under Techniques

The non (less) messy way to chop onion

Onion is a key ingredient in just about any cuisine. I don’t know about you but I always had trouble getting the dice right. But that was then and this is now. My wonderful wife got me cooking lessons at Sur la Table in Dallas and Ed Kernan taught me the technique below. Enjoy!

5 Comments

Filed under Techniques

Making Paneer (Indian Cheese)

Paneer (pronounced – “Pun – knee -r”) is one of the mainstays of North Indian cooking. I hated it with a vengeance when I was growing up. While my siblings would perk up every time my mom mentioned that we were having a paneer dish for dinner, it would at best elicit a groan from me.

However preferences change over the years and I now enjoy Paneer.

Note: Interesting article on tastes changing http://www.associatedcontent.com/article/1305655/why_do_our_tastes_change_as_we_age.html?cat=5

You can go to an Indian grocery store or a natural food store and buy Paneer. But to me it just isn’t a good product. It is usually hard and tastes processed. And it is expensive (yes, I conform to the stereotype of a cheap Indian). Long story short, I started making my own a few years back and haven’t gone back to the store bought variety. Considering how easy it is to make, I hope you too will too, if you don’t already.

Anyway, here goes.

INGREDIENTS (for about 8oz of Paneer)

1/2 gallon of full fat milk – For some reason, Braum’s milk works exceptionally well. Must be the Oklahoma cows.

Lemon juice (from a bottle or a real lemon) or white vinegar

Cheesecloth or Muslin

8 or 10 lb dumbbell (or any other weight) to work out while you are waiting for the cheese to make. Just kidding.You will need the weight though to squeeze out water from the cheese.

Two chopping boards

STEPS

1. Boil the milk

2. Once the milk comes to a rolling boil, reduce heat.

3. Add lemon juice or vinegar a little at a time (about a teaspoon at a time). If you are using real lemons, just squeeze them a quarter at a time.

4. Wait for the milk to curdle. It should separate into a greenish liquid(whey) and white curds (see picture below).

5. Turn the heat off and strain the whey through a cheesecloth or muslin.

6. You should have a pouch of the curdled milk now.This is Paneer (see below).

7. Hang the pouch to let the whey drain out. Leave it for 10 mins.

8. Squeeze out more whey from the pouch. Twist the open ends of the cheesecloth/muslin.

9. Put the pouch between the two chopping boards and weigh it down with the dumbbell. This dumbbell probably got more use out of it today than it has in months.

10. Wait for 15 mins to let the water out.

11. Open the pouch. Your Paneer is ready.

12. Chill in the fridge for a few hours to let it firm up a little before you use it.

9 Comments

Filed under Indian, Techniques